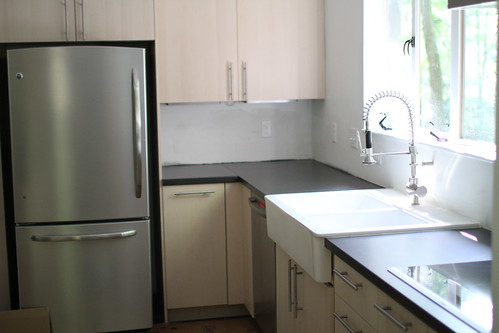
Once all the appliances were in the kitchen was mostly finished. All that was left to do was to add final details and, of course, unpack way too many dishes, gadgets and utensils. Since the small details are all important but not necessarily related (other than by being in the kitchen), I will do a small blurb about each.
Pendant light: The kitchen in our apartment had one, very bright, ceiling mounted fluorescent light, a small task light in the stove hood and no windows. This meant that you had very few lighting options and honestly, I used only the hood light even when it was dark because of the ugly light supplied by the standard ceiling fixture. We really wanted the new kitchen to have some options for lighting that could change depending on the time of day and the task at hand. As you will recall from Chapter 2, we had the electrical box for the existing pendant light moved from the middle of the room to a position centered above the sink and installed 6 new pot lights which are on a dimmer. These are the main lights in the room and they provide a nice, bright light that isn't too harsh. In addition to the pot lights, we also installed the new pendant over the sink, put in 3 under cabinet lights and installed an exhaust hood with a built-in light.
We looked for a long time at pendant lights and explored options from a $20 IKEA fixture to a much more expensive glass globe light. In the end, we chose the Renovators Harbor Pendant 2 finishes (that is the actual name of the fixture as listed on the website), an industrial style metal pendant from Shades of Light. As the name implies, it is available in two finishes, Olde Bronze and Polished Nickel. We couldn't decide which finish we liked best so we ordered both and waited until almost everything else was done so we could see the fixture in the space. Final answer: Olde Bronze. The brushed stainless finishes on the appliances and the faucet just didn't work with the Polished Nickel but the bronze echoed the new coat of oil rubbed bronze that was freshly spray painted on our window hardware and just looked more like it belonged in the room.
 |
| Pendant installed. |
Likewise we considered several options for under cabinet lights. You would never guess that there are so many types of lights for this purpose, but we found out that you can get under cabinet lighting in fluorescent, halogen, xenon and LED. A local lighting store had all the options on display so I and my lovely MIL took a trip to check them out and determine which one looked best. All of the lights were a little more blue than I wanted, but the xenon was pretty tolerable and low voltage so we relayed our opinions to M, who agreed that xenon was the winner. We considered purchasing the units locally but found that they were much cheaper online. I think we finally ordered ours, in the brushed silver finish, from Amazon. We opted for the brushed silver because it was possible to see the light housing from some angles and the silver looked much nicer than the white or black options. We decided to install 3 units: two under the cabinets to the right of the fridge and one under the cabinet next to the wall oven. This may seem like a strange choice, given that there is more counter space next to the wall oven than next to the fridge, but unfortunately the cabinet boxes dictated what we could install where. We were told that it was unwise to have the light boxes straddle a join in the cabinet boxes, so centering one light under the cabinets next to the fridge wasn't an option as those cabinets are two separate boxes that abut each other (instead of one box with two doors - make sense?). You can see the two lights in the picture below because of the angle, but we don't notice them when we are in the room.
The cabinets next to the wall oven are also comprised of two cabinet boxes, but one of them is double the width of the other which is why there are three doors. The middle and right-hand doors are a single cabinet box so our choices were to use a light under each door or to put only one in the middle (a longer light box would have fit but it would have straddled a cabinet box join so that was out). We decided that three boxes was overkill and just installed one in the center, which provides plenty of light for the space. The under cabinet lights are also on a dimmer, which is helpful for making bottles at 3am.
Cabinet drawer and door hardware: Because all of the cabinets came from IKEA and we were eligible for that lovely 20% discount on most of the additional kitchen hardware, we decided to go with cabinet and drawer handles from the same. This time there was very little debate. M liked the LANSA handles and since I was 7 months pregnant and had a stress fracture in my foot and an active toddler, I liked whatever I didn't have to choose. And I do really like the LANSAs...they have a simple, clean aesthetic and are easy to pull. Radar likes them also and spends a considerable amount of time biting the ends, mostly when he wants to be fed which is anytime we are in the kitchen. Silly kitty.
Soft-close hinges/drawers: We bought dampers for both our cabinet doors and our drawers from IKEA and had them installed on all the cabinets and drawers. I think that the large pantry door required a different damper, but I can only find one of them online. These were a really nice addition to the room, especially since we have a kiddo who isn't too gentle when he closes things.
Drawers vs. cabinets: For storage in the kitchen we opted to use drawers for anything below the counter and cabinets for anything above, with the exception of the cabinet under the sink. I think this is pretty conventional but storing my pots and pans in drawers was new to me and seemed a little strange. A year later I have no idea how I ever could have been okay with the gymnastic twisting that was required to get anything from the very back of my old cabinets. (Side note: anything involving gymnastics makes me think of this old Dave Barry article about potato guns. And then I think about his Weiner mobile article and I go back and read it and laugh until I cry. Where was I?) I really like having everything in drawers and because their listed max load weight was around 100 lbs I put everything I wanted within easy reach into those drawers. One of the many advantages of having our contractor install the cabinets was that he could do things we likely could not have done. Best example: drawers under the cooktop. Our IKEA kitchen rep told us that most people just put drawer fronts over the opening for show, since the cooktop makes it impossible to install the drawers without modification. Thanks to Doug, who was able to mill out the sections of the drawer that would have interfered with the cooktop, I now have two drawers that would have otherwise been wasted space. The presence of the cooktop means that the contents of these drawers must be fairly shallow, so I use the left one for spices (with the Rationell Variera drawer inserts for spice jars - I can't find these on the IKEA site but could swear I saw them in the store recently) and the right one for cutting boards.
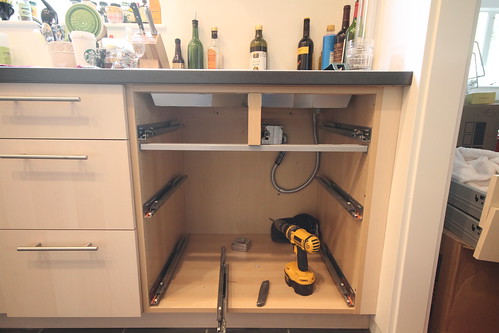 |
| Installation of drawers under the cooktop. |
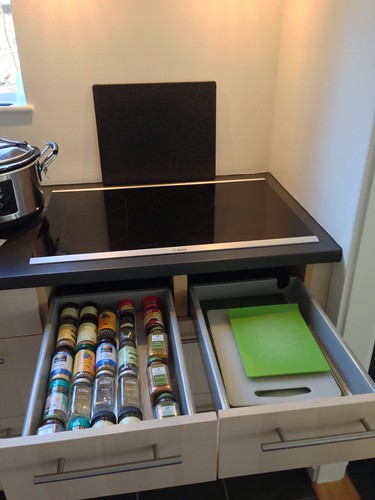 |
| Filled drawers with my random assortment of spices. |
Trash cabinet: We stored our kitchen trash under the sink in our apartment and it was kind of a pain to pull the can out whenever you needed to dispose of something. Instead of repeating that here, we chose to have a cabinet dedicated to the trash next to the fridge, which makes cleaning out the fridge really easy. I will say that having the pull for the trash cabinet at the top of the door is creating a lot of stress on the door where it attaches to the drawer, especially because the Numa tends to get a little too enthusiastic when pulling it open to throw out his banana peels.
Glass doors: We used the plain, birch veneer doors and drawer fronts for most of the kitchen but decided it would be nice to break up the solid wood with some glass front doors. We used them only on the upper cabinets that would be housing dishes and one day, when we don't have so many bottles and colorful plastic dining ware, I hope to have those cabinets contain only white, stainless and glass items for a clean look.
 |
| Glass doors with empty cabinets. |
Pantry cabinet: The pantry cabinet is magical. I never knew you could store so much in one cabinet. We went with the AKURUM high cabinet that was 24"x80"x24", which sounds huge but doesn't look out of place in the room. We decided to use the drawer inserts with a hinged door and I love, love, love this cabinet. Having drawers that pull out one at a time makes it stupid easy to load items in and to find them when you need them. Like all the other kitchen drawers, they can hold a fair amount of weight so I haven't been shy about storing cans and repackaging my grains into large glass jars, partly because they are prettier and partly because they are neater.
Heater: The electricians and Doug installed a toe-kick heater under the cabinet beside the wall oven so our little (or in my case, huge) feet wouldn't get cold in the kitchen. Also because the radiant heat was on that wall and this would be the only heat source in the kitchen during the New England winter. So kind of necessary.
Well, I think that is everything. All the final details. The only thing left is after pics, which will be up soon!
Be well,
Me.
No comments:
Post a Comment