When last we spoke, the kitchen was prepped and ready for all the new things that would go into it. To refresh your memory, this is what it looked like:
 |
| Ready for flooring, cabinet, appliance and fixture installation. |
And this was our end goal:
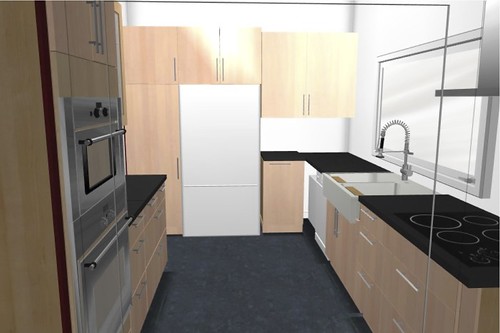 |
| Final layout, looking in from dining room. |
You would think that we (and by we, I mean Doug, the electricians, the plumbers and the painters) were almost done but you would be wrong. There was so much more to do...
Once we finalized the kitchen plan, we headed back to IKEA to order all of the necessary parts. And there are a LOT of necessary parts when building an IKEA kitchen because everything is packaged separately. From the cabinet frames to the drawer fronts to the soft-close hinges, it all comes in individual boxes or bags. This is where the staff in the kitchen department comes in. If you, like M, have spent hours and hours and hours toiling over the less-than-user-friendly kitchen design tool, you can save your final product online and the nice people at IKEA can access it from there. (If you have not, they will sigh heavily and open a session for you.) They inspect your work to be sure that you haven't inadvertently done something stupid that will cause you much woe and more trips to IKEA (which you should just resign yourself to anyway...there is always something else you need) and once they have fixed your amateur mistakes, they print a huge list of required pieces and parts that will eventually become your dream kitchen. They place the order for you and you pay right there but unless you own a semi-truck to cart your dream home, there is no escape from the absurdity of IKEA's home delivery process. In case anyone is interested, I can offer a few tips that will make purchasing an IKEA kitchen (especially during a sale) much less stressful:
1. Take good measurements of your kitchen and then take them again. And again. Having the correct measurements for your space (including those for the floor plan and, unless you are planning some major reworks, the locations for anything requiring power, plumbing or both) will ensure that the dream kitchen you design and purchase will actually fit into your home. I can't tell you how many people we overheard telling an IKEA kitchen rep (hereafter known as IKR) that they were "pretty sure" their kitchen was x width or y length - you need to KNOW these numbers or be prepared for the many repeat trips to IKEA it will take to fix the resulting problems.
2. Spend a lot of time visiting the IKEA kitchen department to look at all the options. It is really helpful to check out their in-house mock kitchens as well as their selection of finishes and fixtures. We had originally planned to have white kitchen cabinets but after seeing the "white" IKEA options in person we realized that they are all off-white instead and not a look we liked. Being able to see so many options on the floor will also help you to think about how you want your kitchen to be organized and since people don't often redo a kitchen more than once, your decisions will affect how you use the space for quite a while.
3. As much as it sucks, use the design tool to get as far as you can in the process before sitting down with the IKR, especially if you are shopping during a sale. We finalized our plan with an IKR about a month before the sale ended and ordered everything about two weeks later which allowed us time to make final tweaks and to avoid the crowds of people that were starting to appear. The IKR we worked with (let's call him Alex, which I think was his name - he was super helpful and knowledgeable and, as a bonus, had really cool tattoos) told us that wait times to meet with them get out of control in the final two weeks of the sale. Having the undivided attention of an IKR for as long as you need them is really important as they will be placing the order themselves and you don't want them hurried.
4. Know your design well enough to be able to competently check your parts list before the IKR places the order. Then check it again. When you design the kitchen using IKEA's tool it will provide you with a list of all of the necessary components as they need to be ordered. The IKR will use this list to place the order but it is a really long list and mistakes happen. Alex, wonderful as he was, ordered the wrong size for one of our cabinets and it is only because M had looked at everything for so long that he caught it.
5. Expect to have to make at least one return trip for wrong or missing parts. Even though M caught the incorrectly sized cabinet, we still got a couple of things that we shouldn't have and were missing a few things that we needed. Luckily we are only 45 minutes from IKEA, so return trips were a hassle but not a deal breaker. Public service announcement: I do not advise purchasing an IKEA kitchen if you are either unable or unwilling to make many trips to IKEA.
6. Plan to order your entire kitchen, including any fixtures, handles and appliances, at least 2 weeks before a sale ends or before you need the parts. Alex told us (and he was right) that the risk of having to back order pieces or parts gets significantly higher as a sale draws to a close, especially for cabinet parts. IKEA kitchens are popular in large part because they are already so cheap...add more discounts on top of that and IKEA kitchens become the Cabbage Patch Kid of the remodeling world. Since we were working with a very hard deadline we made sure to have our order in before the rush.
7. If you don't like the first IKR you meet, find another one. As with life in general, there are people you mesh with and people you don't, and also total a-holes that no one meshes with who should just stay home. You will be sitting with this person for a while so try to find someone who doesn't make you want to slap them.
8. Once you have a final layout, plan to be at IKEA for at least 2 hours when ordering your kitchen and know that it could take longer. Alex (helpful, helpful Alex) recommended that we come in just after lunchtime during the week, as the IKRs tend to be less busy at that time. We took his advice but we still needed all of those two hours plus some to finalize the order, check out, realize there was a mistake and have it fixed and wait for the home delivery process to finish. (This process was even more stressful for me because we were 45 minutes away from the Numa's school and I cannot deal with being late to pick him up.)
After all the months of planning and at least 5 trips to IKEA we now just had to wait for our kitchen to arrive. And arrive it did, in 99 boxes. 99 boxes people. And our kitchen isn't even that big. It took two guys almost half an hour to bring it in the house and they were almost running.
 |
| All boxes for the kitchen. (Though, to be fair, the one with the black writing wasn't from IKEA.) |
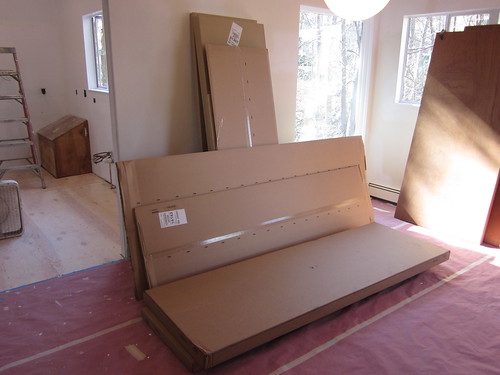 |
| Yet more boxes. It was ridiculous. |
When I saw all the boxes my first thought was: "I am so glad I don't have to assemble this;" which was followed quickly by: "Where is my sink?" I think that Doug was also less than excited, but he did an amazing job and pretty soon the entire main level was covered in cabinets.
I still don't know how they all fit in our kitchen but fit they did and, pretty quickly, it started to look more like this:
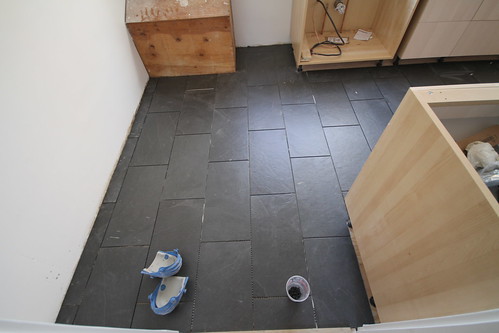
Once the base cabinets were installed the tile guys were able to start on the flooring. The kitchen abuts spaces with two different floor finishes: the original slate tile in the front entryway and the wood floor in the dining room. We didn't want to bring a third type of flooring into the space, but matching either of the original floors exactly was going to be difficult to impossible. We quickly ruled out wood floors since the cabinets were a birch finish and it seemed like using wood on the floor as well would be too much wood (that's what she said). We didn't really want to spend the money to put slate tile in the kitchen but we really liked the color of the slate in the entryway and thought it would be a nice contrast to the light colored cabinets while also tying in the dark counters. We decided that our best option was to find a tile that matched the color of the slate in the entryway as closely as possible. I think I visited every tile shop in and around Boston and just when I thought all hope was lost, I stumbled across this awesome 12" x 24" porcelain tile at a store in Burlington. It has a matte finish and was the closest color match to the front hall that we could find. As a bonus, it was one of the biggest budget wins in our renovation project, coming in at less than $300 for the entire kitchen.
Doug recommended that we tile as far under the cabinets as the supports would allow so that once the plinth was installed you wouldn't see cut tile edges. The tile would also extend all the way under the refrigerator and to the awkward box covering the basement stair head space. We decided to lay the tile with the long edge parallel to the dining room door to make the kitchen seem wider and not like a hallway.
The tile took under a day to lay down and only part of another day to grout. We decided to use dark grout and in the end my only regret is that we didn't go darker. It looks great but I wish we had been able to almost match the tile. Once the floor was in the rest of the cabinets went up quickly and pretty soon we had this:
We talked with Doug and our IKR at length about how best to handle the unusable corner, since it still needed a base that could support the counter top. In the end, we decided to get a base cabinet to cover the weird box and have Doug hack it to fit. In a feat worthy of a super contractor, Doug also managed to get side by side drawers under the cooktop which I had thought impossible. The usable space in the drawers is pretty shallow, but they are perfect for spices and cutting boards. They were some of the last things that were installed so pictures will come later. You can also see that we chose to use different doors for the upper cabinets next to the wall oven. We planned to store dishes and bar ware in those cabinets and decided that the ÄDEL glass doors (which I don't think you can get in the birch finish any more but thankfully, we got an extra in case of eventual wear or breakage) would be a nice way to break up the acres of plain birch.
That wraps flooring and cabinets. Chapter 4: appliances, counter tops and my beloved sink.
Be well,
Me
 |
| Holy cabinets Batman! |
I still don't know how they all fit in our kitchen but fit they did and, pretty quickly, it started to look more like this:
 |
| Hi Doug! |
Once the base cabinets were installed the tile guys were able to start on the flooring. The kitchen abuts spaces with two different floor finishes: the original slate tile in the front entryway and the wood floor in the dining room. We didn't want to bring a third type of flooring into the space, but matching either of the original floors exactly was going to be difficult to impossible. We quickly ruled out wood floors since the cabinets were a birch finish and it seemed like using wood on the floor as well would be too much wood (that's what she said). We didn't really want to spend the money to put slate tile in the kitchen but we really liked the color of the slate in the entryway and thought it would be a nice contrast to the light colored cabinets while also tying in the dark counters. We decided that our best option was to find a tile that matched the color of the slate in the entryway as closely as possible. I think I visited every tile shop in and around Boston and just when I thought all hope was lost, I stumbled across this awesome 12" x 24" porcelain tile at a store in Burlington. It has a matte finish and was the closest color match to the front hall that we could find. As a bonus, it was one of the biggest budget wins in our renovation project, coming in at less than $300 for the entire kitchen.
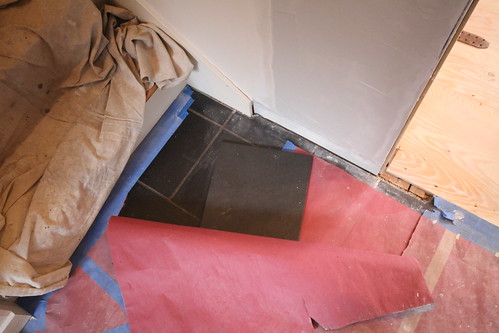 |
| Sexy and cheap. We have a winner. |
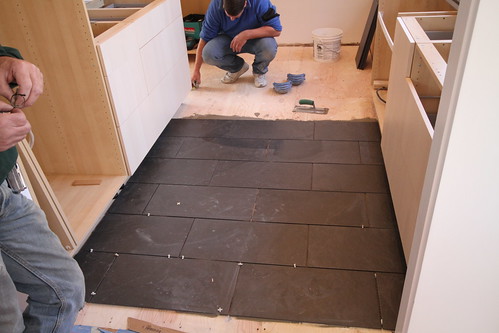 |
| Floor tile progress, seen from dining room. |
 |
| From the front hall - just needs grout! |
The tile took under a day to lay down and only part of another day to grout. We decided to use dark grout and in the end my only regret is that we didn't go darker. It looks great but I wish we had been able to almost match the tile. Once the floor was in the rest of the cabinets went up quickly and pretty soon we had this:
 |
| Pantry cabinet, fridge box, pull-out trash bin and dead corner space. |
and this:
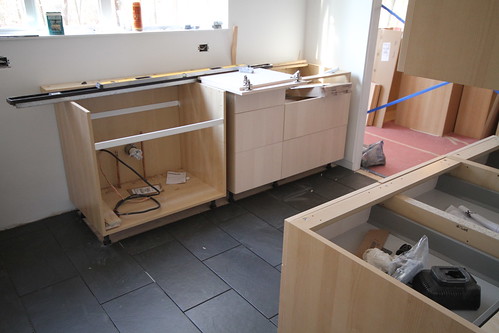 |
| Mount for my sink (!!) and cooktop. |
and this:
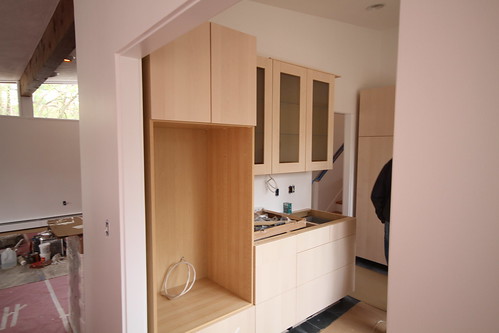 |
| Wall oven/microwave unit, base cabinet storage and glass front top cabinets. |
We talked with Doug and our IKR at length about how best to handle the unusable corner, since it still needed a base that could support the counter top. In the end, we decided to get a base cabinet to cover the weird box and have Doug hack it to fit. In a feat worthy of a super contractor, Doug also managed to get side by side drawers under the cooktop which I had thought impossible. The usable space in the drawers is pretty shallow, but they are perfect for spices and cutting boards. They were some of the last things that were installed so pictures will come later. You can also see that we chose to use different doors for the upper cabinets next to the wall oven. We planned to store dishes and bar ware in those cabinets and decided that the ÄDEL glass doors (which I don't think you can get in the birch finish any more but thankfully, we got an extra in case of eventual wear or breakage) would be a nice way to break up the acres of plain birch.
That wraps flooring and cabinets. Chapter 4: appliances, counter tops and my beloved sink.
Be well,
Me
No comments:
Post a Comment