We have been in the house for a little over 4 months now and what was new now seems like it has always been. It is hard to even imagine still being in our apartment, especially since we have added a new family member. The new tiny person (whose nickname has still not emerged) arrived on July 8th after many months of pregnancy misery mixed with as much happy anticipation as can exist in a home in transition. She is a good baby so far and she and I are getting to know one another in all types of situations, including the wee hours of every single morning. I actually think I saw the first indication of a real smile this morning and plan to spend my afternoon making a total idiot of myself trying to get her to repeat it. I had forgotten how much I love tiny babies, from their noises and smells (not all of them are bad!) to their tiny toes and big eyes. Mostly I just love watching them become little people and I am really enjoying most of my time with her, though I would by lying if I didn't also acknowledge that newborn fussiness is the pits and that I miss my sleep. I keep reminding myself to appreciate all of it, because it goes by so very, very fast. Pretty soon, she will be helping her brother to push buttons on the new automatic cat feeder and requesting songs in the car, which M and I are sometimes allowed to sing. The Numa's taste in music runs to the eclectic (Two Door Cinema Club and the Bird and the Bee are two of his favorites...we are so proud) and his new go-to song is Enjoy the Silence by Depeche Mode. I love this kid.
So four months after moving and five weeks after welcoming the little one, we are starting to find a new normal. For instance, I am typing this while bouncing a sleeping baby in an Ergo. I also have to take frequent breaks, because she can sense productivity and objects to it on every level. I type a bit and then we walk a bit and it will still take me all day to finish this, but she is worth it. The house is livable but there is so much left to do. We have designated the nursery, the office and the basement as storage areas and make small amounts of progress each day. Still, it is going to be a while before we really feel settled. Right now, our focus is on the kids - getting to know the new baby and helping Numa with the transition to being a big brother, which includes the ongoing move into his big boy bed. He is doing great with the baby, constantly wanting to kiss her and hold her, though his desire for the latter tends to flag quickly. We are trying to keep him as involved as possible and to say yes to his requests to interact with her as much as we can so that he will feel included.
I have many, many goals for my time on maternity leave. I will be home (we think) until just after the new year so I have several months to get stuff done. Of course, all of that hinges on this baby eventually letting me put her down for longer than 10 minutes at a time. I manage to scrape just enough time on most days to do a load of laundry and figure out dinner, but that is usually it. One of my goals, though, is to post here at least 3 times a week. Anything else will be a bonus. We will see how it goes, but to help me accomplish this goal, I am not going to impose a structure on this blog. I am going to keep writing about house progress, my kids, being a mom, sewing and/or crafting and anything else that is relevant to me at the time. Maybe a theme will emerge, maybe not, but either way it will be an outlet for me during what can be an isolating time.
Be well,
Me
Monday, August 13, 2012

Friday, May 4, 2012
House Tour Part 3 - Downstairs and Basement
Now that I have been through the main level and the bedroom level, the lower level and basement are all that is left. These are somewhat "bonus" rooms for us, as they include a large family room, a guest bedroom and an office/sewing room, plus a third full bathroom. This is space above and beyond what we have had for the past 7 years, so we are very excited! I will finish out this series with a post about the basement and back of the house soon.
The stairs from the main floor lead into the downstairs family room. It is a large room with lots of windows and views of our jungle of a backyard. This will become a play room for the kiddos and will eventually lead onto a much more finished back patio. All of the carpet has already been removed, as has the asbestos tile underneath it, so new carpet will be going into the entire downstairs except the bathroom. The ceiling fixture will be replaced, as the current one a) is not my style and b) has exposed light bulbs that will likely not survive their inevitable encounters with illegally thrown matchbox cars. All of the walls in this room need to be patched and painted, and the window hardware that is basically painted into the wall will be removed. Additionally, the Verizon FIOS box that someone decided should live on an exposed wall in the house will be relocated to the basement. I am certain that this task will take many phone calls and will eventually be done by a very grudging service person, but it should never have been allowed to go there in the first place.
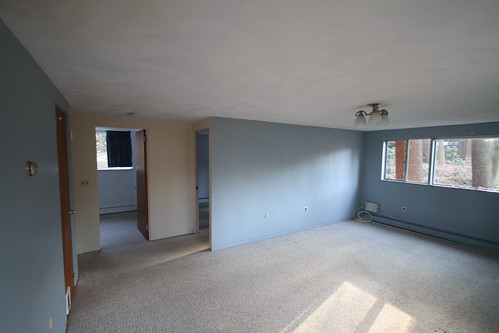
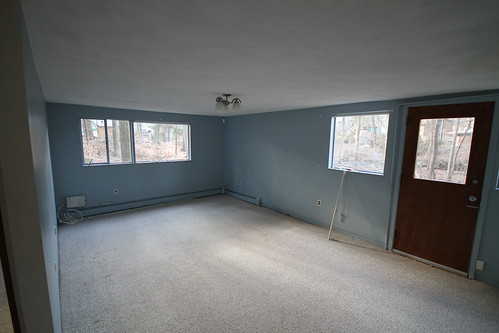
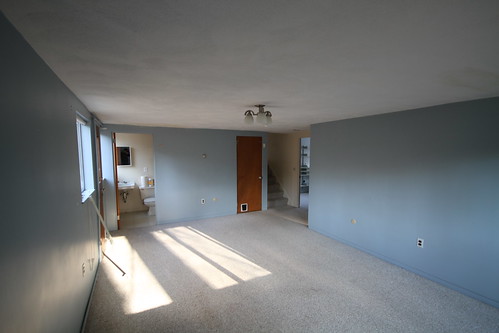
The stairs from the main floor lead into the downstairs family room. It is a large room with lots of windows and views of our jungle of a backyard. This will become a play room for the kiddos and will eventually lead onto a much more finished back patio. All of the carpet has already been removed, as has the asbestos tile underneath it, so new carpet will be going into the entire downstairs except the bathroom. The ceiling fixture will be replaced, as the current one a) is not my style and b) has exposed light bulbs that will likely not survive their inevitable encounters with illegally thrown matchbox cars. All of the walls in this room need to be patched and painted, and the window hardware that is basically painted into the wall will be removed. Additionally, the Verizon FIOS box that someone decided should live on an exposed wall in the house will be relocated to the basement. I am certain that this task will take many phone calls and will eventually be done by a very grudging service person, but it should never have been allowed to go there in the first place.
Clockwise from left: door to basement; landing at bottom of stairs; door to guest bedroom; door to office; family room. You can also see the lovely Verizon wall box.
View from the bottom of the stairs.
View from the far end of the room. You can see the downstairs bath at the other end.
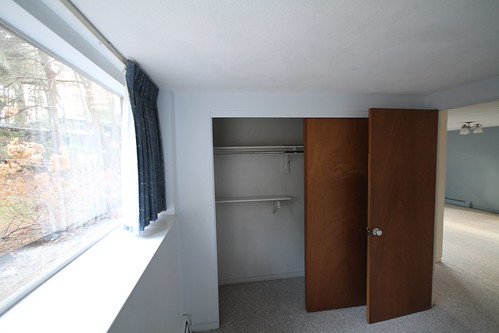
The smaller downstairs room was going to be M's office, but after reevaluating the space we have decided to use the small room as a guest bedroom and the larger room as our shared office. The shelving on the walls and the window treatments are leaving and the whole room will be patched, painted and re-carpeted. The closet is a decent size and will probably hold some of our stuff while leaving a space for guests to use. We were planning to put our queen-size sleigh bed in the guest bedroom, but we have doubts that we can fit it into this small space...this looks like a job for IKEA! This room also has a single, switched wall sconce that we will probably replace for the time being. We haven't decided how we feel about sconces yet.
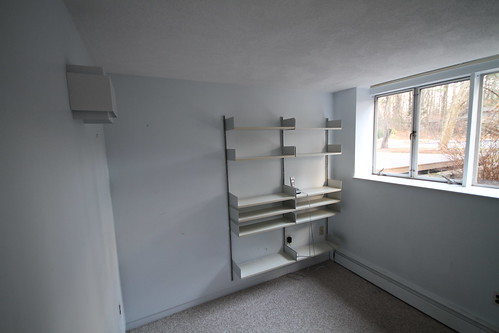
View from door. The shelves were original to the house and can hopefully be sold.
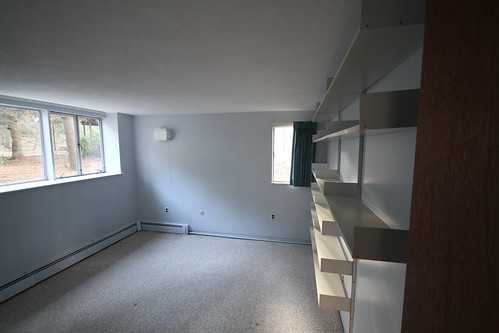
View from door
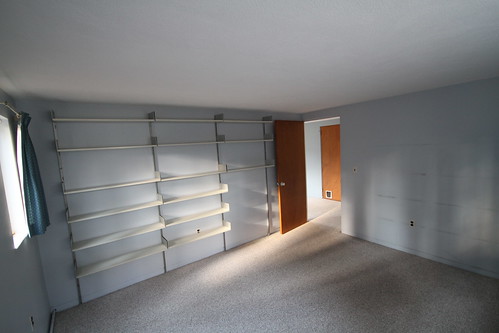

View from door. The shelves were original to the house and can hopefully be sold.
View of closet. I may add a dresser to the bottom of one side for clothes storage.
The larger downstairs room is going to be a shared office for me and M. This room is much like the smaller room, so it too will get patched, painted and re-carpeted, have the shelves and window treatments removed, and the sconce replaced.
View from door
View from front windows.
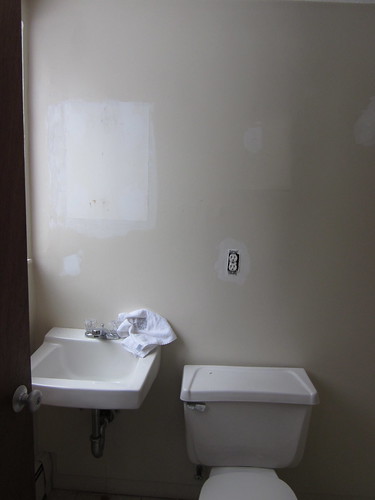
The downstairs bathroom was nothing to write home about, but not that awful either. Our plan was to eventually redo the entire bathroom, but once we found out that the tile floor was asbestos, we decided that putting down a temporary floor didn't make much sense so we basically gutted the room. The existing shower was undersized given the amount of space and the stretch of wall to the right of the shower was literally useless. So this room will get new everything and hopefully be really nice, but that is a post for another day. For some reason, this room did not get photographed as well as most of the others, so the pics below aren't great. I will have to look for better ones.
View from doorway.
Shower and blank wall.
And that's the downstairs. We are so excited to have this extra space that will allow the Numa and our soon-to-arrive little person lots of space to play and also give us room to accommodate guests, as the Grandmas are both planning to be here for a while this summer.
Be well,
Me
Thursday, May 3, 2012
And then it was May.
Where did April go? I am not sure, but I don't think I miss it. We finally moved out of our apartment and into our house (with a brief stay at a local hotel) at the beginning of April. The renovations were *mostly* completed but as of today, there are still things left to do, albeit small ones. Items left on the list are installing wall sconces in all bedrooms and capping any exposed connections that won't be getting sconces; installing vanity lights in the upstairs bathrooms; replacing the ceiling light in the family room; final touch-up painting in all rooms; installing the under-sink shelf and glass shower panel in the downstairs bathroom; and unpacking, unpacking, unpacking. Everyone looks so surprised when they find out that we aren't fully unpacked after a month, but with a toddler, full time jobs, a 2 week bought of upper respiratory infections and a very large baby belly inhibiting progress, I am amazed that we have accomplished anything at all. And, oh my, the belly. My abdomen has officially given up and admitted defeat to the apparent amusement of most people I meet. I am so uncomfortable already (and not due till early July...grrrr), with the huge belly, swollen feet, and a very active fetus that I just want to cry. Not to mention punch the next person who grins and asks "are you SURE it isn't twins?" Why does that give people such joy? Also, my patience and sense of humor seem diminished...
I promise myself that I will post the remaining level of rooms as a house tour and then will start to post progress pics very soon. Also, I have a new list of tips for moving your entire household, including pets, and pregnancy updates. But right now, it is time to get the Numa!
Be well,
Me
I promise myself that I will post the remaining level of rooms as a house tour and then will start to post progress pics very soon. Also, I have a new list of tips for moving your entire household, including pets, and pregnancy updates. But right now, it is time to get the Numa!
Be well,
Me
Tuesday, March 20, 2012
House Tour Part 2 - Bedrooms.
The house drama continues. We found more asbestos (!!!) in the downstairs bathroom that was concealed behind the wall and under the shower. It seems that the shower in that bath was not original to the house like we thought, so the second round of asbestos removal begins this week. Oh joy.
Despite the drama, there is lots of progress which is lovely. The kitchen is coming right along and the cabinets will be delivered later this week. The dishwasher and wall oven/microwave will be here next week and the cooktop the week after, leaving just the refrigerator to be chosen and ordered. We even finalized the kitchen floor tile (you can see the tile here, though we ordered it locally from Smethurst Tile in Burlington for a steal - $2.77/sq. ft.) and decided to wait on a backsplash, since we haven't found one that is just right. I am personally in favor of ordering tiles from Heath Ceramics but I still need to get M on board with this plan...
While the chaos continues and winds down, I am going to continue the house tour with the bedroom level. Enjoy!
Walking up the half-flight of stairs lands you in a small hallway. All of the rooms on this level (except the master bath) open into this landing and the hardwood floors that are on the main level continue throughout the upper level. There is a horrible, huge, square recessed light in the hallway ceiling that can't really be replaced as it is, so we will have the hole patched an a normal size box installed for a new light. Unfortunately, we probably won't be able to make the ceiling finish match in that area, so whatever light we choose will need to be big enough to cover the existing outline. You can't see it in this picture but trust me, anything would be better than this light.

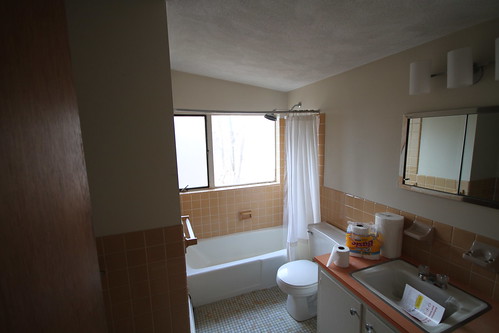
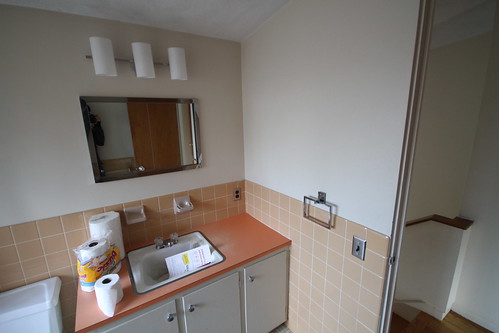
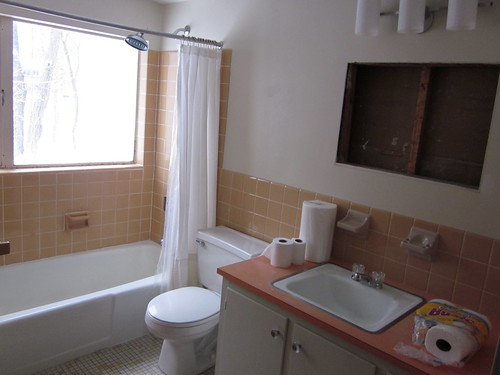
The hall bath is probably the ugliest room in the house, though the master bath and kitchen tie for second place. The tile is an ugly pinky-orangey-taupe non-color and the vanity counter is a pinky-tangerine and really worn. The floor tile defies description and the nicest thing I can say about the whole room is that the tub is in decent shape. We will eventually have to redo this bath, but of the three bathrooms this one is in the best shape so except for a little bit of caulk to repair some tile cracks and removing the in-wall medicine cabinet, we will be leaving it alone for now. Bummer.
Despite the drama, there is lots of progress which is lovely. The kitchen is coming right along and the cabinets will be delivered later this week. The dishwasher and wall oven/microwave will be here next week and the cooktop the week after, leaving just the refrigerator to be chosen and ordered. We even finalized the kitchen floor tile (you can see the tile here, though we ordered it locally from Smethurst Tile in Burlington for a steal - $2.77/sq. ft.) and decided to wait on a backsplash, since we haven't found one that is just right. I am personally in favor of ordering tiles from Heath Ceramics but I still need to get M on board with this plan...
While the chaos continues and winds down, I am going to continue the house tour with the bedroom level. Enjoy!
Walking up the half-flight of stairs lands you in a small hallway. All of the rooms on this level (except the master bath) open into this landing and the hardwood floors that are on the main level continue throughout the upper level. There is a horrible, huge, square recessed light in the hallway ceiling that can't really be replaced as it is, so we will have the hole patched an a normal size box installed for a new light. Unfortunately, we probably won't be able to make the ceiling finish match in that area, so whatever light we choose will need to be big enough to cover the existing outline. You can't see it in this picture but trust me, anything would be better than this light.
Landing.
The hall bath is probably the ugliest room in the house, though the master bath and kitchen tie for second place. The tile is an ugly pinky-orangey-taupe non-color and the vanity counter is a pinky-tangerine and really worn. The floor tile defies description and the nicest thing I can say about the whole room is that the tub is in decent shape. We will eventually have to redo this bath, but of the three bathrooms this one is in the best shape so except for a little bit of caulk to repair some tile cracks and removing the in-wall medicine cabinet, we will be leaving it alone for now. Bummer.
You can't tell here because it was overcast, but the bathroom gets lots of light from the window in the shower.
Closer view of the vanity...oh my.
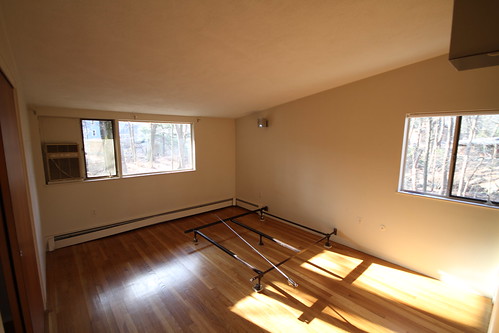
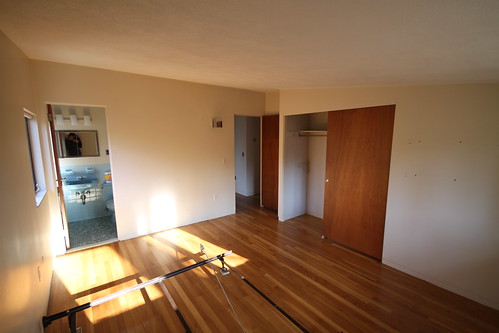
Next to the hall bath is a small linen closet and just beyond that is the master bedroom. The bedroom itself is okay...there is one decently sized closet (though how that will work out with us sharing it is still a mystery to me) and great natural light from the windows. On a side note, I am so excited to be moving to a home where every single room has at least one window and most have more.
View from entrance. Note the very old window AC unit that was likely an air quality hazard. It has already been removed and in the process we discovered that there was no window behind it. Thanks, previous owners!
View into the master bath.
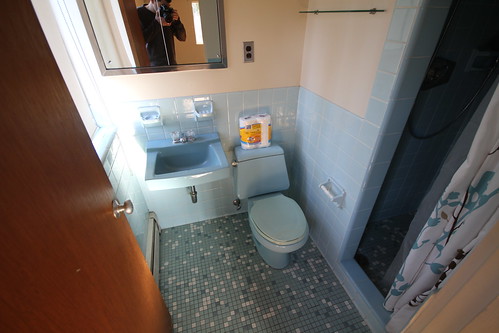
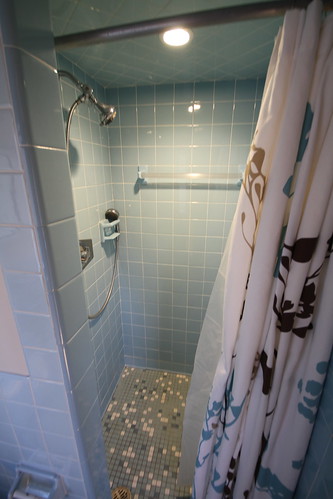
The master bathroom is nothing to write home about. The blue sink, toilet and tile is depressing and why they chose to make every shower in this house even more claustrophobic than they needed to be is beyond me. The floor tile is not in good shape and really needs to be replaced, but we will be band-aiding it for now until we can do a full reno in here. The toilet will likely be replaced before we move in, as it is already loose and I would like to avoid leaks. We will also remove the medicine cabinet in this bath. Unfortunately, even when we get around to doing this bath we can't really expand it, as the size is limited by the hall bath and linen closet so the best we could do is to combine the master and hall bathrooms. We have seen this done, and done well, in a house with our floorplan, but I am nervous about losing a bathroom in the grand scheme of things. We are hoping that living with it for a while will help us make that decision.
Blue.
Tiny shower. This space would be immensely improved if the shower wasn't so closed in from the front and if the ceiling followed the lines of the actual ceiling.
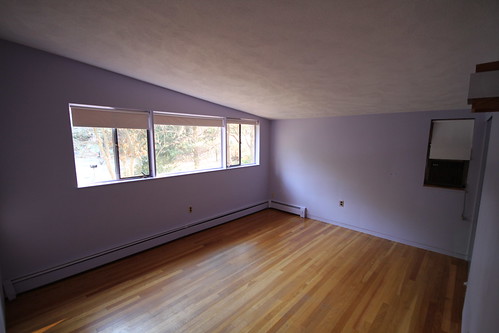
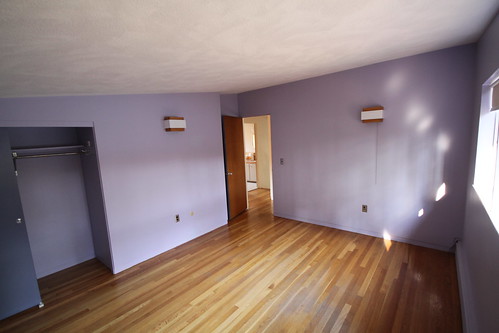
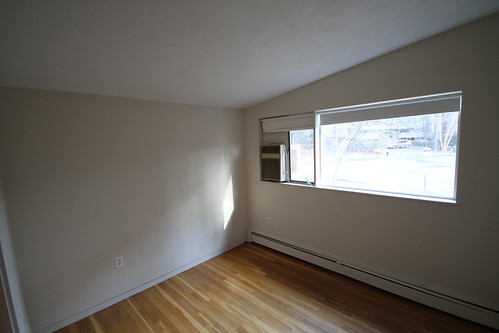
Next to the master bedroom is what I have been calling the purple room. Because it is purple. This bedroom is the same size as the master with a somewhat smaller closet and fewer windows. The AC in this room has also been removed and regaining that window lets in lots more light. All of the bedrooms on this level have at least one hard-wired wall sconce that is switched, and this room and the master have a second sconce that is not switched. We still haven't decided if we will replace the scones or just cover the holes. This will become the Numa's bedroom once it has been de-purpled.
From the doorway.
You can see the closet and the sconces in this picture. Also notice that for some reason the doors in this bedroom were painted at some point - not only are the closet doors blue, but the back and edge of the main door is blue as well. Really?
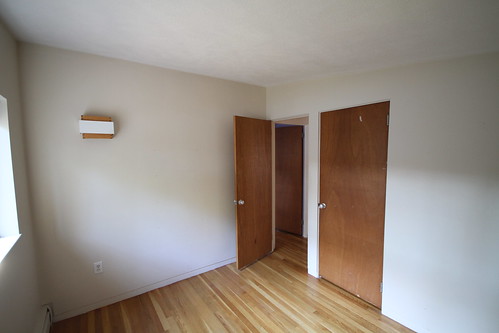
The final bedroom on this level is a tiny room - only about 100 sq. ft. It will be the nursery for now, but I envision it becoming my sewing room as soon as the kids are old enough to realize the disparity in their spaces. Unless we have a third and then two of them will share and everyone will have less space! There is yet another outdated AC unit (also already removed) and a small closet.
From the doorway. Tiny.
Looking back at the doorway and the closet.
And that concludes the bedroom tour. Next up is a tour of the downstairs and the basement, but for now enjoy this brief peek at progress. I am so excited to be moving in less than 2 weeks!
No more medicine cabinet!
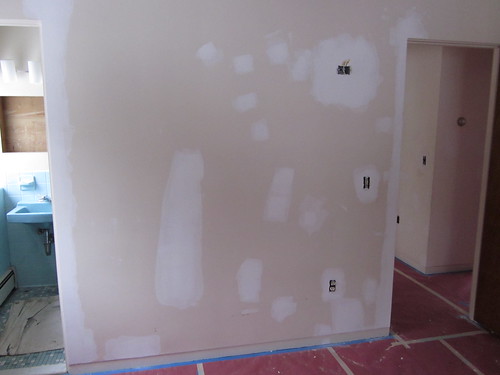
Millions of wall repairs and another missing cabinet.
Be well,
Me
Saturday, March 10, 2012
House Tour Part 1 - Main Level.
Things are happening at the new house. Not as much as we had hoped due to the asbestos issue, but progress nonetheless. We are about to draw to a complete halt, though, until we can get the tile removed from the kitchen and the entire downstairs. Sigh.
In the meantime, I am going to give you a tour of our new house, one floor at a time. Today I am going to focus on the front of the house and the main floor. Enjoy!
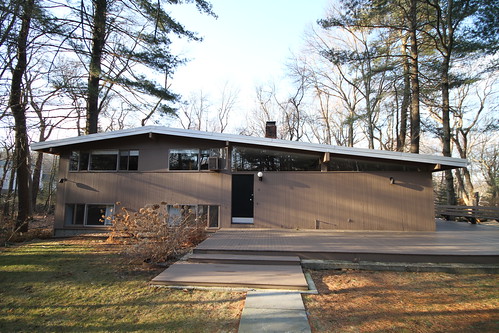
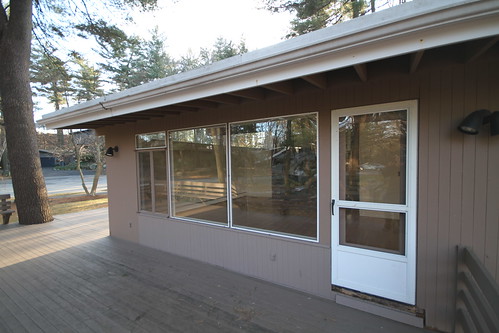
The house is currently painted a sick looking brown/tan color. It either has too much pink or too much yellow depending on the light and the angle at which you look. The exterior lighting is both boring and not bright enough. One section of siding underneath a living room window was replaced at some point and neither the type of siding nor the paint matches. Lovely. The landscaping (what little there is) is a mess and at least one tree needs to be removed. All this to say...the exterior needs work. Eventually, we will get around to that.
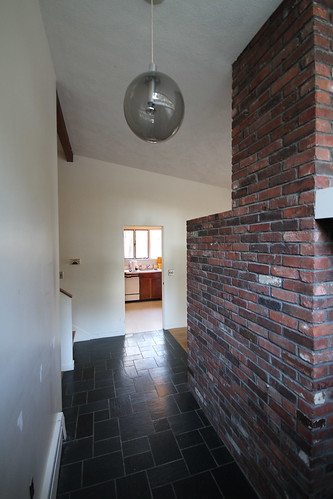
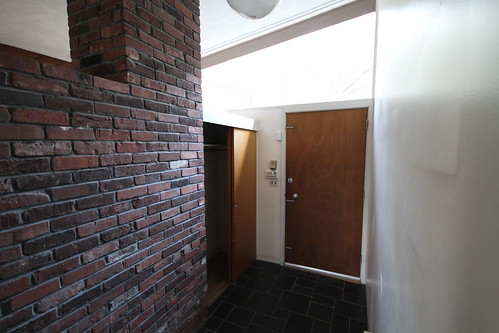
The entry way has a small coat closet which abuts the back of the fireplace. When we bought the house there was an odd, too-large shelf affixed to the left wall that was apparently made of stones from a Chinese monastery. Thankfully, the sellers wanted to keep it and it went to France with them. Straight ahead you can just see the centrally located stairs (that either lead down to the lower level or up to the bedroom level) and the door into the kitchen. The tile in this area is slate and I wish we could match it for the kitchen, but that seems unlikely.
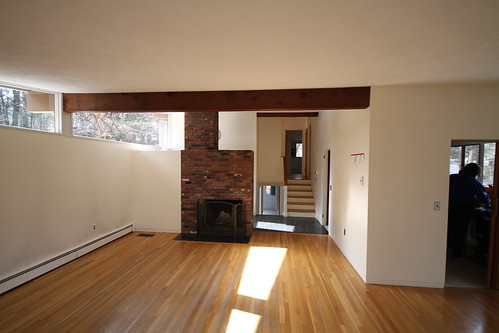
The living room is large and has lots of windows. The fireplace is the main focal point and we can't wait to spend time in this space. The walls all need to be patched and repainted and eventually we need to reline the chimney and replace the can lights. All in all, though, this room is in great shape and one of the reasons we love the house.
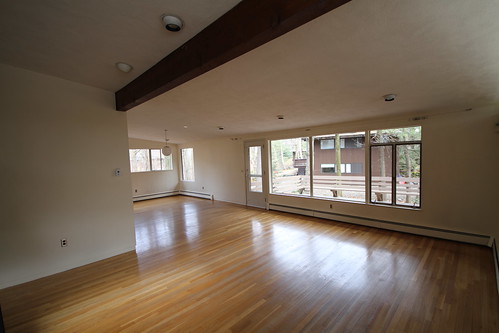
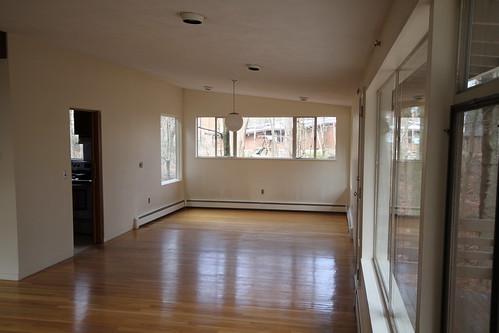
Adjoining the living room is the expanded dining room that is on the back of the house. It also has lots of windows and is large enough that I hope to fit a breakfast nook into the far end. The addition has sunk a bit, but it seems to be due to typical movement and not related to stability issues. The can lights and chandelier need to be replaced and it needs a fresh coat of paint, but otherwise this room is pretty good.
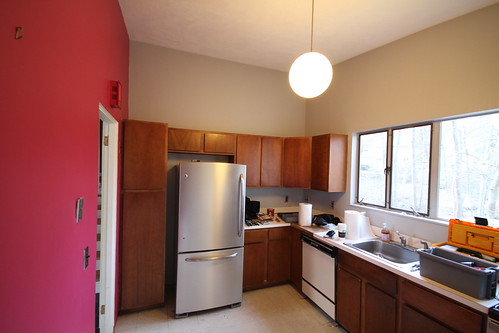
The kitchen has two entrances: one from the foyer and one from the dining room. They both had doors when we bought the house but we have already removed one and the other is also leaving. I could give you lots of details about the issues in this room, but suffice it to say that from the magenta wall (???) to the late 80's vintage dishwasher, this room is a hot mess.
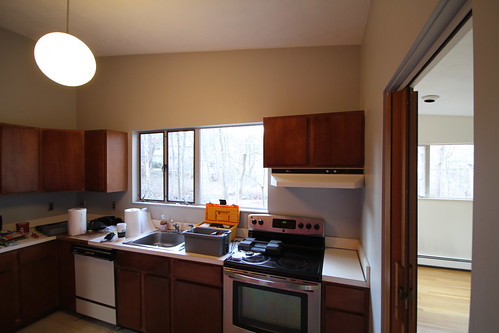

Our original plan for the kitchen was to remove all of the cabinets and countertops, the sink and the dishwasher and to keep the current fridge and range. After discovering that the tile had asbestos and we would essentially have to gut the kitchen, we decided to go all in and start with new everything. The full list of items for the kitchen remodel now includes:
1. Opening both doorways to allow better flow through the room. The opening from the foyer will probably only widen by a few inches but the opening into the dining room will extend from the front of the cooktop cabinet to the front of the wall oven cabinet. I will post a rendering of the new layout soon and this will make much more sense.
2. Updating the existing electrical to bring it up to code (which means installing GFCI outlets) and adding can lights and a pendant over the sink. We are also going to add under cabinet lighting.
3. Replacing the asbestos tile floor (which will be abated by a local company) with slate or porcelain tile.
4. Replacing all appliances. We are going to install a wall oven/microwave combo and an electric cooktop instead of a one-piece range and put in a new dishwasher, all from Bosch. The range hood is from IKEA. We have yet to pick a new fridge because it is hard to find a counter-depth fridge that is rated well but has no ice maker/water dispenser in the door.
5. New cabinets, countertops, sink and faucet, all from IKEA. We were thrilled to find out about the 20% off kitchen sale at IKEA and managed to save a ton of money, essentially getting the range hood for free!
6. A glass tile backsplash. I wasn't completely sold on glass tile at first because none of the edging options appealed to me. But then somone (thanks Mom!) managed to find a bullnose edge finishing tile which solved the problem. Hurray!
7. New paint.
And that wraps the main level. Next up: bedrooms!
Be well,
Me
In the meantime, I am going to give you a tour of our new house, one floor at a time. Today I am going to focus on the front of the house and the main floor. Enjoy!
The house is currently painted a sick looking brown/tan color. It either has too much pink or too much yellow depending on the light and the angle at which you look. The exterior lighting is both boring and not bright enough. One section of siding underneath a living room window was replaced at some point and neither the type of siding nor the paint matches. Lovely. The landscaping (what little there is) is a mess and at least one tree needs to be removed. All this to say...the exterior needs work. Eventually, we will get around to that.
Our new abode.
See the mismatched siding?
The entry way has a small coat closet which abuts the back of the fireplace. When we bought the house there was an odd, too-large shelf affixed to the left wall that was apparently made of stones from a Chinese monastery. Thankfully, the sellers wanted to keep it and it went to France with them. Straight ahead you can just see the centrally located stairs (that either lead down to the lower level or up to the bedroom level) and the door into the kitchen. The tile in this area is slate and I wish we could match it for the kitchen, but that seems unlikely.
Looking into the kitchen.
Looking at the front door.
The living room is large and has lots of windows. The fireplace is the main focal point and we can't wait to spend time in this space. The walls all need to be patched and repainted and eventually we need to reline the chimney and replace the can lights. All in all, though, this room is in great shape and one of the reasons we love the house.
Fireplace.
Windows onto the deck and entrance to the dining room.
Adjoining the living room is the expanded dining room that is on the back of the house. It also has lots of windows and is large enough that I hope to fit a breakfast nook into the far end. The addition has sunk a bit, but it seems to be due to typical movement and not related to stability issues. The can lights and chandelier need to be replaced and it needs a fresh coat of paint, but otherwise this room is pretty good.
Dining room.
The kitchen has two entrances: one from the foyer and one from the dining room. They both had doors when we bought the house but we have already removed one and the other is also leaving. I could give you lots of details about the issues in this room, but suffice it to say that from the magenta wall (???) to the late 80's vintage dishwasher, this room is a hot mess.
View from corner (the doorway on the left leads to the foyer).
View from the corner again (the doorway on the right leads to the dining room). Note how the range is offset from the hood by a good 8 inches.
Don't you just love that pink wall?
Our original plan for the kitchen was to remove all of the cabinets and countertops, the sink and the dishwasher and to keep the current fridge and range. After discovering that the tile had asbestos and we would essentially have to gut the kitchen, we decided to go all in and start with new everything. The full list of items for the kitchen remodel now includes:
1. Opening both doorways to allow better flow through the room. The opening from the foyer will probably only widen by a few inches but the opening into the dining room will extend from the front of the cooktop cabinet to the front of the wall oven cabinet. I will post a rendering of the new layout soon and this will make much more sense.
2. Updating the existing electrical to bring it up to code (which means installing GFCI outlets) and adding can lights and a pendant over the sink. We are also going to add under cabinet lighting.
3. Replacing the asbestos tile floor (which will be abated by a local company) with slate or porcelain tile.
4. Replacing all appliances. We are going to install a wall oven/microwave combo and an electric cooktop instead of a one-piece range and put in a new dishwasher, all from Bosch. The range hood is from IKEA. We have yet to pick a new fridge because it is hard to find a counter-depth fridge that is rated well but has no ice maker/water dispenser in the door.
5. New cabinets, countertops, sink and faucet, all from IKEA. We were thrilled to find out about the 20% off kitchen sale at IKEA and managed to save a ton of money, essentially getting the range hood for free!
6. A glass tile backsplash. I wasn't completely sold on glass tile at first because none of the edging options appealed to me. But then somone (thanks Mom!) managed to find a bullnose edge finishing tile which solved the problem. Hurray!
7. New paint.
And that wraps the main level. Next up: bedrooms!
Be well,
Me
Sunday, March 4, 2012
DIY Ribbon Loop blanket.
I'm back. Here is the very long post talking about my method for making ribbon edged blankets for kids. Enjoy!
The projects I completed tonight were identical and were based on a project I have actually made several times previously. My son, like most small kids, is obsessed with tags. Give him any plush toy and he will immediately locate and begin to twist the tag. He loves them and has for quite a while. One of his teachers at daycare mentioned that you could buy a toy that was nothing but tags online but after I looked them up, I couldn't bring myself to pay what I considered an exorbitant amount of money for less than $3 worth of materials. Additionally, their printed ribbons were wicked tacky. The basic small blanket ringed with ribbons seemed like an easy project so I used some of the "minky" fabric (I loathe that word, but it is the most recognized description of this fabric) I had on hand plus some brightly colored quilting cotton I bought with a coupon at Jo-Ann. (Aside: I never shop at Jo-Ann or Michaels or any of those similar stores without coupons - 40% off is the bomb, people.) I also used part of my large stash of ribbon and some additional ribbon I got at a local craft store (Playtime, for any Arlington peeps - they have a great ribbon selection, btw). Below I describe my method for making the small blanket. You can easily churn this out in an hour or less if you have all the necessary materials on hand.
1. Cut two equal sized squares from a minky fabric (or any soft textured fabric, really, as long as it would be comfortable for little hands to explore) and a quilting weight cotton (I will sometimes use more than one cotton fabric and create a quilting square to mix colors and patterns). For the small blanket I use a 12-14 inch square, which is small enough for baby hands to carry and large enough to showcase most fabric patterns. I am not terribly particular about my final measurements, but if you are, read through the directions and do the appropriate math to account for seam allowances.
2. Cut 4 inch lengths of ribbon and lay them out at regular intervals along the perimeter of the right side of your quilting cotton until the arrangement is pleasing to you. I typically do 4 to 5 ribbons per side and try to make sure that the colors are evenly distributed. If you are using a cotton fabric with a regular pattern it is nice to line up the ribbons with the pattern.
3. Once you have a pleasing layout for the ribbons, fold each ribbon in half to create a loop and pin the loop to the previously chosen location on the right side of your quilting cotton. The ends of the loop should overhang the edge of the fabric by about 1/4 of an inch. See the picture below for an illustration. Continue pinning the ribbons in this way until all ribbons are attached to the cotton, making sure that the ends of the loops are pointing away from the center of the fabric.
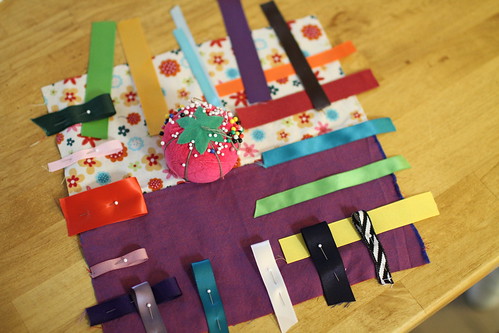
4. Stitch all the way around the perimeter of the quilting cotton with a 1/4 inch seam allowance. This will attach the ribbon loops to your fabric and eliminate the need for pins to hold the loops in place in the next step.
5. Place your minky square and your cotton square right sides together and pin around the perimeter. Make sure that your ribbons (which should be securely attached to your quilting cotton - did you do step 4?) are tucked neatly inside so that you don't have to pick out a ton of freaking stitches after you accidentally sew part of a ribbon loop into the edge.
6. Sew around the perimeter of the fabric sandwich with a 1/2 inch seam allowance, leaving a 2 inch opening in the middle of one side. I like to sew with the cotton on top, because I think my machine sews it better that way, but either way you align it make sure that you are catching both fabrics and all ribbon ends in your stitching and that you leave a 2 inch opening on one side to enable turning the blanket right-side-out. I mark the area I'm not going to sew with two closely spaced pins so that I don't forget. Back-stitch on both sides of the opening to protect your stitches during the turning process.
7. Clip your corners, being careful not to cut through your stitching. Even up any rough edges and cut off any overhanging ribbon edges (or don't...all of this will be encased in the blanket and won't show, so if you don't feel like doing this step, it is a-ok with me). Turn your blanket right side out and use a pointed object to push out the corners. I use a metal chop stick. Pin the area around the hole to close the blanket.
8. Top stitch all the way around the blanket with a matching or contrasting thread, depending on your desired look. Make sure that the top stitching completely closes the hole you left for turning and tug all ribbons to ensure that they are securely attached. Remember, this is for a baby!
The nice thing about these blankets is that they are super portable and lightweight and the ribbon loops give you tons of places to secure a toy strap, making it harder for your little one to Hans Gruber* it. I have given several of these as gifts and made a couple for my little guy and they seem to go over well. They are easy to customize to individual color preferences and washable to boot. The Numa's current favorite toy is a dinosaur with ribbons for spikes (named Bacon...my son is so cool), so one of my future projects will be a plush toy with ribbons.
**If anyone does read this and use the tutorial, please know that the manufacturers of the original product in no way contributed to this tutorial and they do not authorize anyone to use this tutorial to sell this or similar products. From what I understand, they don't look too kindly on that sort of thing either. So, don't use this to sell these things, k? Personal use only.**
*When the Numa was a baby, he would randomly drop or sometimes throw things on the floor, which my husband and I started referring to as Hans Grubering. You know, like when John McClane throws Hans Gruber (oh, Alan Rickman, how I love you) off the roof in the first Die Hard? Anyway, it stuck and now we use it for anytime someone throws something onto the ground. Stick around, people. It's going to be a thing. And these pretzels are making me thirsty. I clearly need to go to sleep.
Happy Weekend!
Be well,
Me
(This was originally posted on July 30, 2011 but I am re-posting to move to the top of the blog.)
The projects I completed tonight were identical and were based on a project I have actually made several times previously. My son, like most small kids, is obsessed with tags. Give him any plush toy and he will immediately locate and begin to twist the tag. He loves them and has for quite a while. One of his teachers at daycare mentioned that you could buy a toy that was nothing but tags online but after I looked them up, I couldn't bring myself to pay what I considered an exorbitant amount of money for less than $3 worth of materials. Additionally, their printed ribbons were wicked tacky. The basic small blanket ringed with ribbons seemed like an easy project so I used some of the "minky" fabric (I loathe that word, but it is the most recognized description of this fabric) I had on hand plus some brightly colored quilting cotton I bought with a coupon at Jo-Ann. (Aside: I never shop at Jo-Ann or Michaels or any of those similar stores without coupons - 40% off is the bomb, people.) I also used part of my large stash of ribbon and some additional ribbon I got at a local craft store (Playtime, for any Arlington peeps - they have a great ribbon selection, btw). Below I describe my method for making the small blanket. You can easily churn this out in an hour or less if you have all the necessary materials on hand.
1. Cut two equal sized squares from a minky fabric (or any soft textured fabric, really, as long as it would be comfortable for little hands to explore) and a quilting weight cotton (I will sometimes use more than one cotton fabric and create a quilting square to mix colors and patterns). For the small blanket I use a 12-14 inch square, which is small enough for baby hands to carry and large enough to showcase most fabric patterns. I am not terribly particular about my final measurements, but if you are, read through the directions and do the appropriate math to account for seam allowances.
2. Cut 4 inch lengths of ribbon and lay them out at regular intervals along the perimeter of the right side of your quilting cotton until the arrangement is pleasing to you. I typically do 4 to 5 ribbons per side and try to make sure that the colors are evenly distributed. If you are using a cotton fabric with a regular pattern it is nice to line up the ribbons with the pattern.
3. Once you have a pleasing layout for the ribbons, fold each ribbon in half to create a loop and pin the loop to the previously chosen location on the right side of your quilting cotton. The ends of the loop should overhang the edge of the fabric by about 1/4 of an inch. See the picture below for an illustration. Continue pinning the ribbons in this way until all ribbons are attached to the cotton, making sure that the ends of the loops are pointing away from the center of the fabric.
4. Stitch all the way around the perimeter of the quilting cotton with a 1/4 inch seam allowance. This will attach the ribbon loops to your fabric and eliminate the need for pins to hold the loops in place in the next step.
5. Place your minky square and your cotton square right sides together and pin around the perimeter. Make sure that your ribbons (which should be securely attached to your quilting cotton - did you do step 4?) are tucked neatly inside so that you don't have to pick out a ton of freaking stitches after you accidentally sew part of a ribbon loop into the edge.
6. Sew around the perimeter of the fabric sandwich with a 1/2 inch seam allowance, leaving a 2 inch opening in the middle of one side. I like to sew with the cotton on top, because I think my machine sews it better that way, but either way you align it make sure that you are catching both fabrics and all ribbon ends in your stitching and that you leave a 2 inch opening on one side to enable turning the blanket right-side-out. I mark the area I'm not going to sew with two closely spaced pins so that I don't forget. Back-stitch on both sides of the opening to protect your stitches during the turning process.
7. Clip your corners, being careful not to cut through your stitching. Even up any rough edges and cut off any overhanging ribbon edges (or don't...all of this will be encased in the blanket and won't show, so if you don't feel like doing this step, it is a-ok with me). Turn your blanket right side out and use a pointed object to push out the corners. I use a metal chop stick. Pin the area around the hole to close the blanket.
8. Top stitch all the way around the blanket with a matching or contrasting thread, depending on your desired look. Make sure that the top stitching completely closes the hole you left for turning and tug all ribbons to ensure that they are securely attached. Remember, this is for a baby!
The nice thing about these blankets is that they are super portable and lightweight and the ribbon loops give you tons of places to secure a toy strap, making it harder for your little one to Hans Gruber* it. I have given several of these as gifts and made a couple for my little guy and they seem to go over well. They are easy to customize to individual color preferences and washable to boot. The Numa's current favorite toy is a dinosaur with ribbons for spikes (named Bacon...my son is so cool), so one of my future projects will be a plush toy with ribbons.
**If anyone does read this and use the tutorial, please know that the manufacturers of the original product in no way contributed to this tutorial and they do not authorize anyone to use this tutorial to sell this or similar products. From what I understand, they don't look too kindly on that sort of thing either. So, don't use this to sell these things, k? Personal use only.**
*When the Numa was a baby, he would randomly drop or sometimes throw things on the floor, which my husband and I started referring to as Hans Grubering. You know, like when John McClane throws Hans Gruber (oh, Alan Rickman, how I love you) off the roof in the first Die Hard? Anyway, it stuck and now we use it for anytime someone throws something onto the ground. Stick around, people. It's going to be a thing. And these pretzels are making me thirsty. I clearly need to go to sleep.
Happy Weekend!
Be well,
Me
(This was originally posted on July 30, 2011 but I am re-posting to move to the top of the blog.)
Friday, February 24, 2012
Wop wop.
And of course, the tile is asbestos. Cue the woe and dollar signs. Sigh. Well, this will cost us a little more and push back the timeline, but fortunately we don't currently have any possessions in the house so it will be much easier to remediate than it would be after we moved. Plus, the ugly floor in the downstairs bath has to go! Optimism FTW!
Be well,
Me
Be well,
Me
Subscribe to:
Posts (Atom)